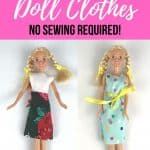

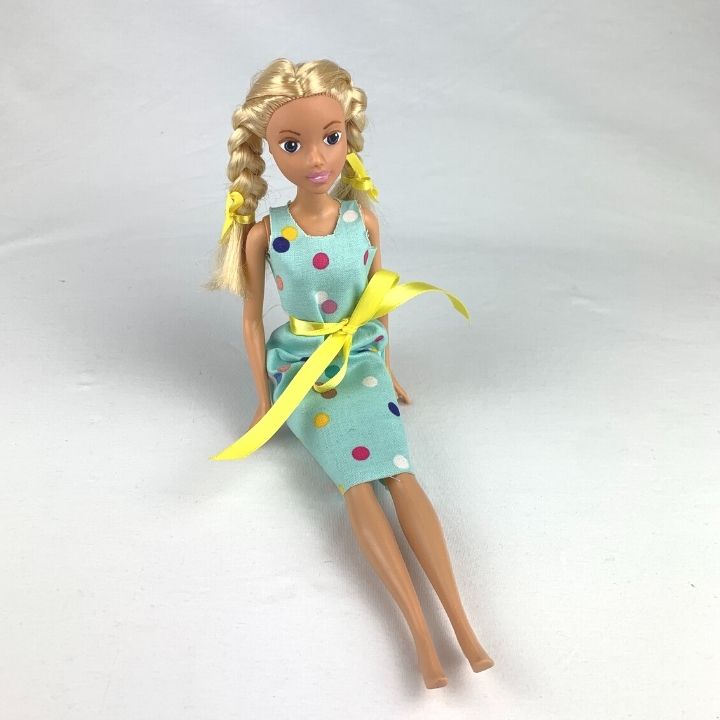
Learning how to make doll clothes has been super fun!
I love to sew, but making something small like doll clothes has never seemed worth the trouble of dragging out my sewing machine and all the other “things.”
So when we took on our Doll Makeover Project, we figured out several ways to make doll clothes without sewing!
We were so happy with how they turned out that we made patterns for each design.
Lucky you, I’m including all the patterns we designed for no-sew doll clothes in this post FOR FREE!
Links in this post may be affiliate links, which means I may earn a commission if you make a purchase from any of them, at no additional cost to you. You can find out more information by reading my full disclaimer.
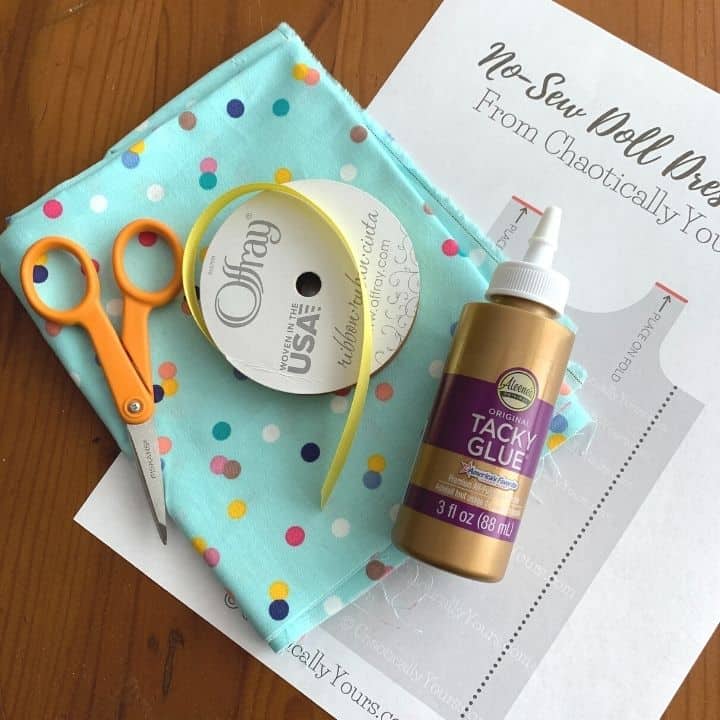
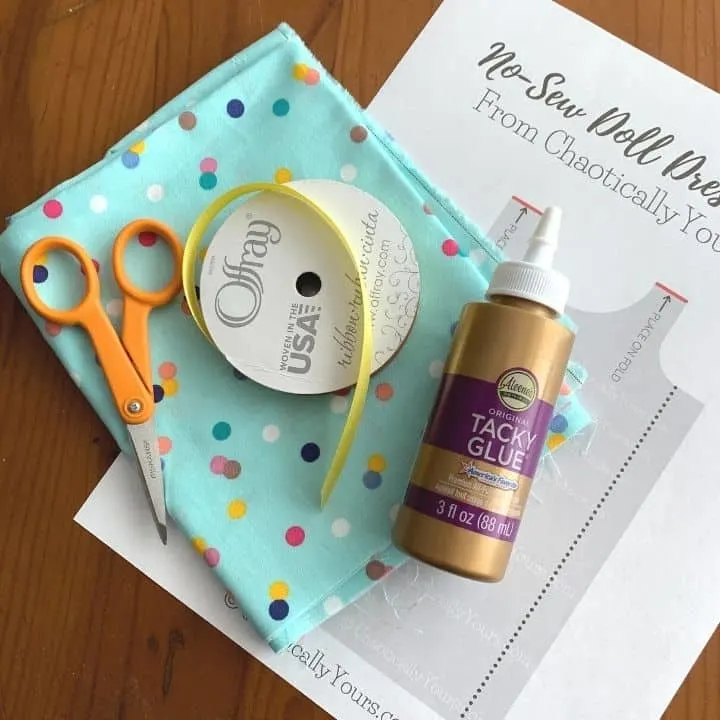
No Sew Doll Clothes Supplies
To make doll clothes of your own, you only need a few common items.
What you’ll need:
- Scissors
- Fabric
- Straight Pins and/or chalk
- Craft Glue
- Ribbon
- An iron
I don’t know about you, but I have special “fabric scissors” that no one is allowed to use except me. I know, it’s a little obsessive, but once you start cutting all the things with your scissors, they lose the sharpness and don’t cut fabric as well anymore.
I love a classic Fiskar scissor, and they’re great for this project.
For the fabric, you can use anything you have on hand, or you can head over to your local craft store and pick up some Fat Quarters (usually found in the quilting section) for this project. They’re the perfect size and are usually pretty inexpensive.
For the dress you’ll need one piece of fabric that is at least 14 by 5 inches and 10 inches of ribbon, whatever width you like.
For the skirt, you’ll need one piece of fabric that is at least 8 by 5 inches and 12 inches of ribbon that’s 1/8 inch wide.
You want a really good craft glue for making doll clothes. School glue just isn’t gonna cut it.
I love Aleene’s Tacky Glue. It’s fantastic for all craft project, and it’s my go-to glue for all things fabric related.
You can use any type of ribbon your heart desires on this project.
How To Make Doll Clothes
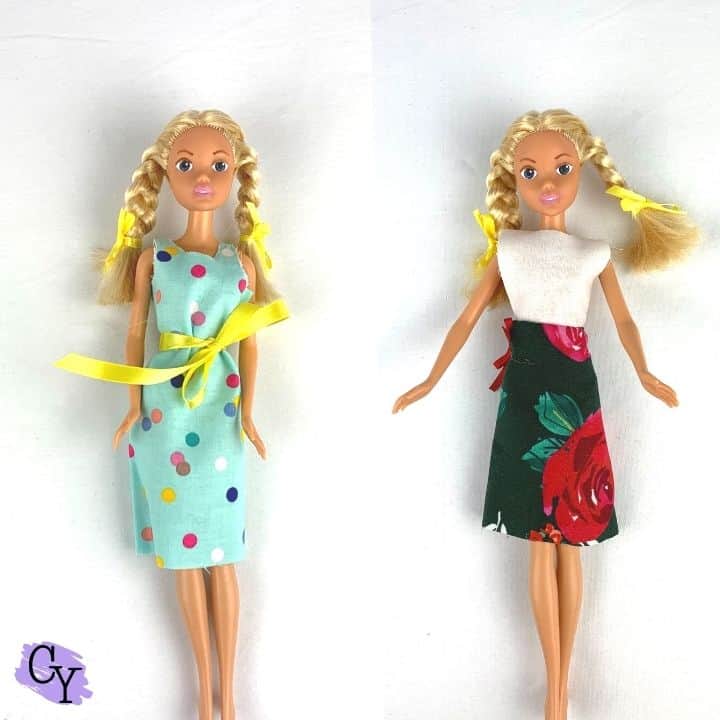
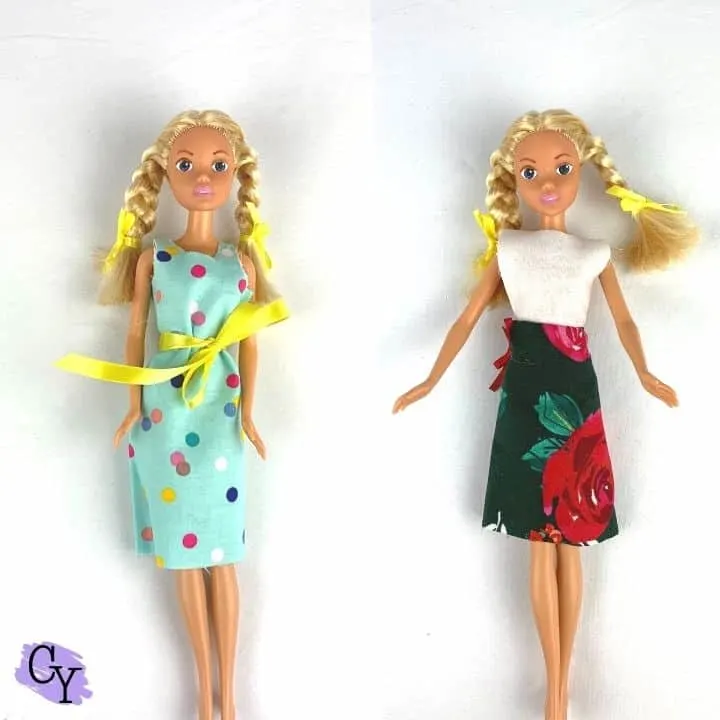
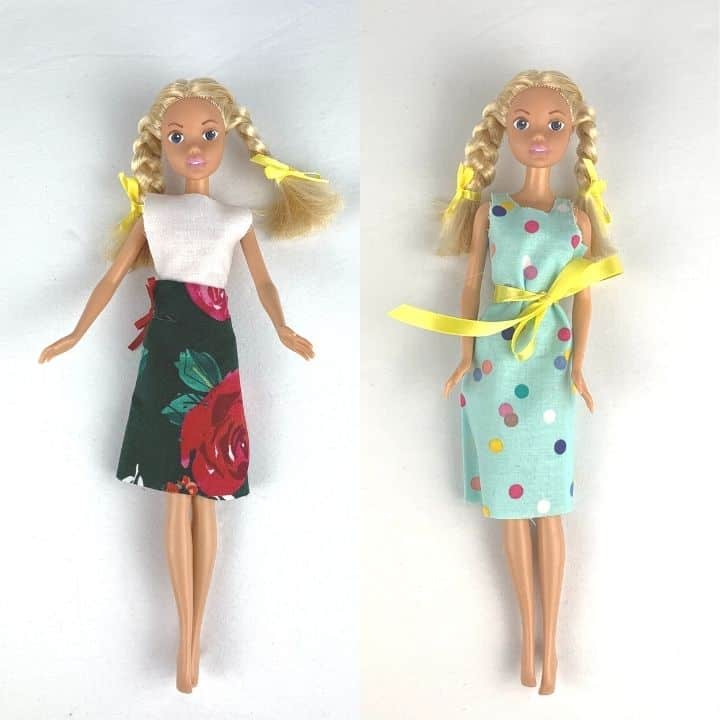
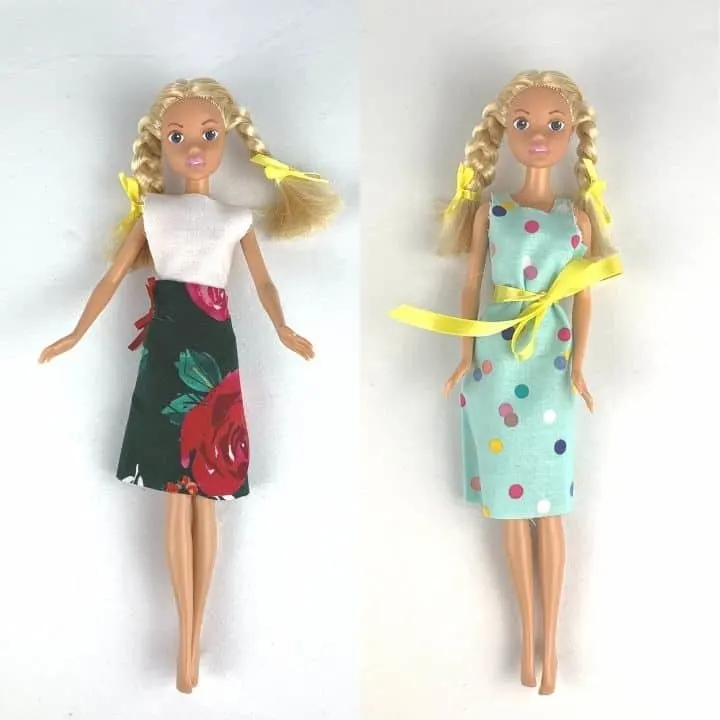
We created a dress and a skirt for this project and both of them are super easy to make.
The patterns we’ve created fit a standard 12″ size Barbie doll.
Printable patterns for both are available at the bottom of this post.
Cutting The Pattern

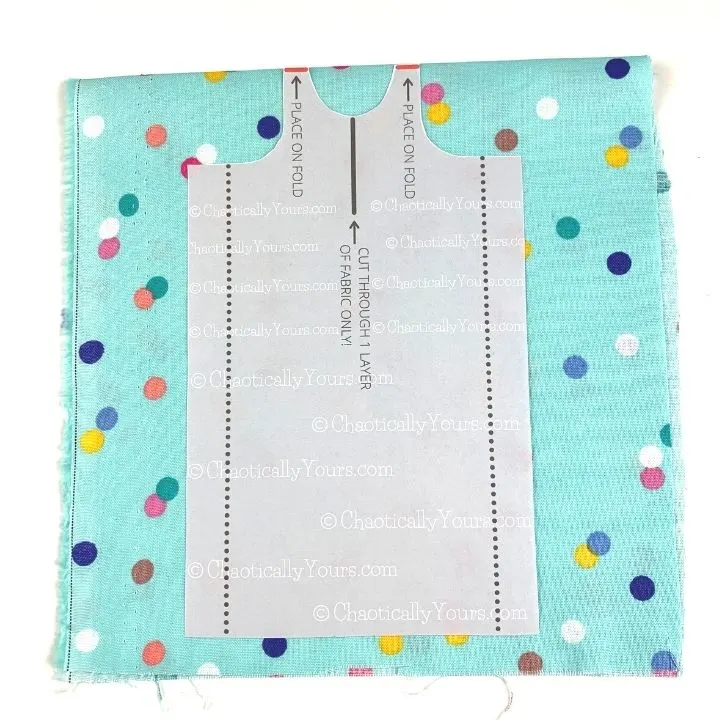
For both projects, start by cutting out your paper pattern.
Once it’s cut, you’ll want to use whatever method works best for you for getting the pattern cut out from the fabric.
Traditionally, patterns are secured to fabric with some straight pins and then cut. This works really well for old style tissue paper patterns.
But if you’re working with regular printer paper, it gets a little trickier.
For this type of paper, I recommend tracing the pattern onto the fabric with chalk. It works really well and comes right off with a little water.
Be sure to mark not only the solid lines, but the dotted lines as well. The dotted lines are fold lines.
While you won’t be cutting the dotted lines, they do mark areas that are important later in the creation of your doll clothes.
For the dress, fold your fabric in half, long ways, so you have a two layer piece that is now at least 7 by 5 inches. You’ll need to line the red lines up along the fold.
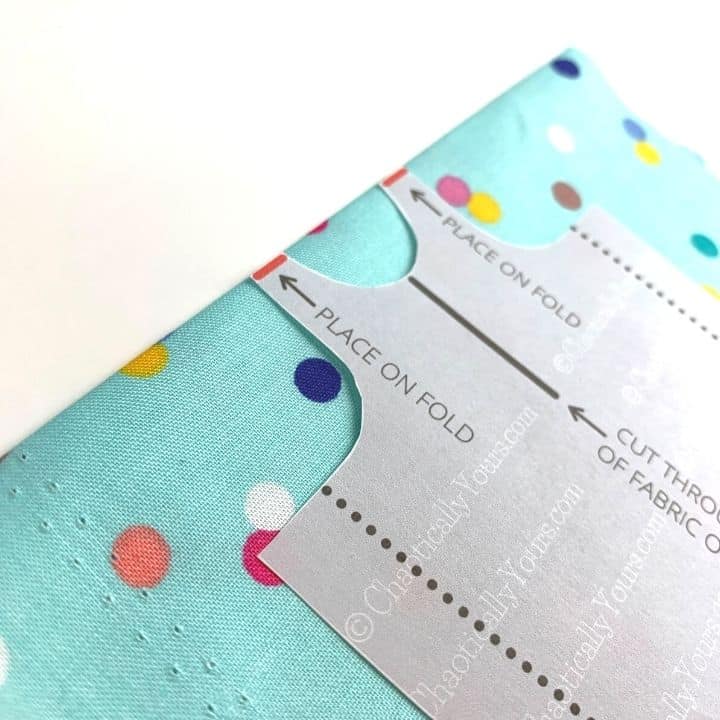

Also, only cut the slit for the neckline through one layer of the fabric. This is an opening at the back of the dress so the doll’s head can get through.
For the skirt, cut your pattern out on one layer of fabric. Be sure to cut the slit marked with a black line.
Once your pattern is traced, you’ll want to cut along the edges of the gray box and along all the solid black lines, including the line off the circle in the middle of the fabric for the doll dress and the slit on the side for the doll skirt.
Do NOT cut along the red lines. Those are only there to be lined up with the fold in the fabric.
Once you’ve cut out your fabric, you’re ready to move onto the actual garment creation.
Assembling the Doll Dress
Putting together the doll dress is quite easy, and just requires a little ironing and a little glue.
Lay your fabric out with the right side facing down.
Fold the fabric along the area where the dotted lines were marked, and iron these flaps down to create a nice crisp fold.
Now fold your cut fabric in half, wrong sides together, so that those flaps we just ironed meet each other and the short sides of the fabric line up.
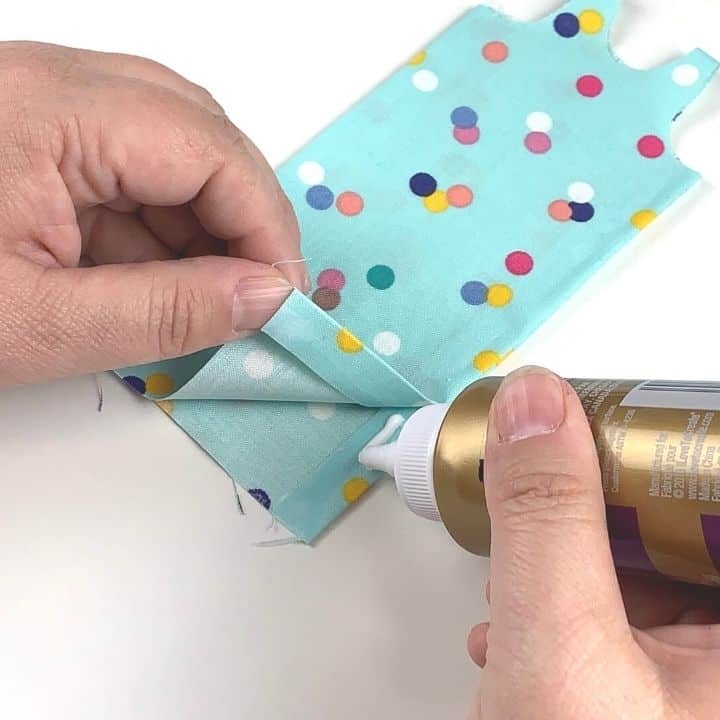

Run a very thin bead of glue down the side of the doll dress as close to the edge as possible, taking care NOT to put any glue in the arm hole cut out.
Press the fabric together tightly.
Repeat this for the other side.
Allow the glue to dry, and turn your doll dress right side out.Place your dress onto your doll.
Tie the ribbon around the waist of the doll for a belt.
And now you’ve made a dress!

Assembling the Doll Skirt
Putting together the doll skirt is just as easy as making the dress.
Trace and cut the pattern for the doll skirt, taking care to cut the slit in the side of the skirt, and mark the fold lines.
Once your pattern has been cut, lay your cut fabric out right side down, and fold it along the area marked by the dotted line in the pattern. Iron this fold so you have a nice crisp edge again.
Open the fold back up and lay your ribbon out along the fold. You want it as close to that fold as possible so that when you fold the fabric down again, it completely covers the ribbon with some additional overlap.
Hod the ribbon in place with a few straight pins.
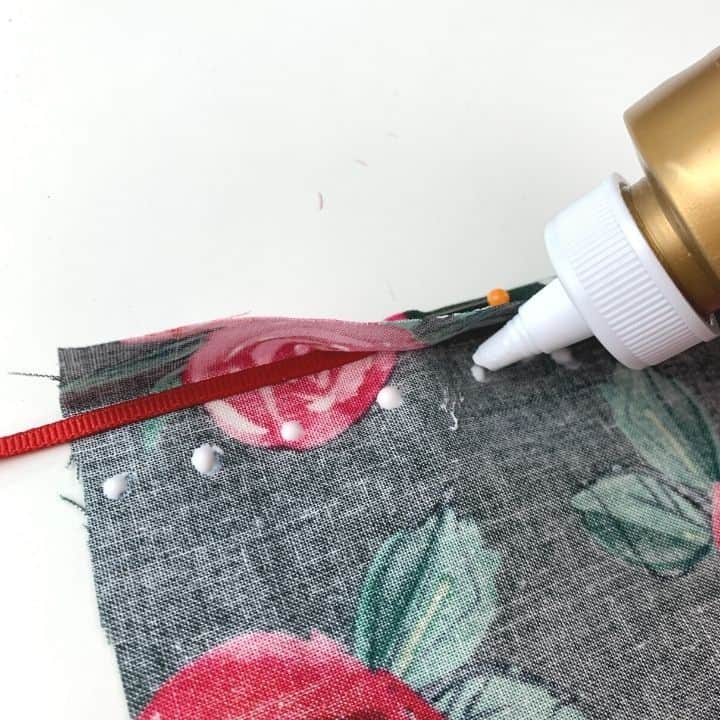
Place very small dots of glue about a quarter to a half inch apart along that overlap area. DO NOT OVERGLUE THIS PART!
You need to take care not to get any glue on the ribbon so that it can move freely in the tunnel you’re creating with the fabric. You don’t want to use a full line of glue here because you want the fabric to be able to bunch together a bit.
Once you’ve placed the glue, fold the fabric over the ribbons and press firmly.
Let the glue dry completely.
Now wrap the newly created doll skirt around the waste of your doll, running one end of the ribbon through the slit cut in the side of the skirt.
Pull the ribbon through and wrap it completely around the waist for a belt.

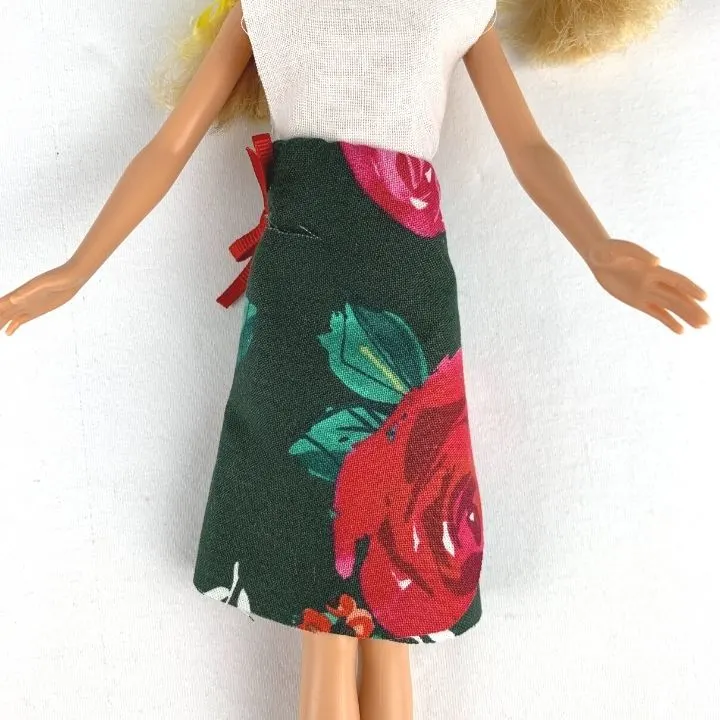
You’ve just made a doll skirt!
How easy was that?
Now that you’ve learned how to make doll clothes, you can do it over and over again!
My daughter and I had a ton of fun playing with different fabrics and decorations.
You can download the patterns through the links below. You can use the patterns over and over again to make doll clothes for all your Barbie sized dolls!
Have you ever made doll clothes? How did they turn out? Tell me in the comments!
*Patterns are for personal use only, and should not be used to make doll clothes to sell. Please contact us to reprint for commercial use or for pattern licensing.
Need more fun activities to do with your children? Use this tutorial to Make Your Own Kite or find out what what Bubble Solution Recipe works best!
Chelly Wood
Friday 8th of September 2023
I love the pale blue fabric with colorful polka dots!
Evelyn
Sunday 19th of March 2023
Hello, do you have measurement pattern for a bigger doll. Like 16 to 20 inches?
Louise Emery
Tuesday 28th of March 2023
I don't unfortunately, but I'll try to put one together in the future.