Complete Guide to Photography at Hraunfossar Waterfall in Iceland

- History of Hraunfossar
- Access to Hraunfossar Waterfall
- Equipment You’ll Need to Photograph Hraunfossar
- Best Camera Settings for Photography at Hraunfossar
- How to Compose a Shot at Hraunfossar
- Best Seasons for Photography at Hraunfossar
- Hraunfossar in Autumn
- Hraunfossar in Summer
- Winter at Hraunfossar
- Northern Lights at Hraunfossar
- How to Make the Most of a Photo Shoot at Hraunfossar
- How to Get to Hraunfossar

There’s no doubt that Hraunfossar waterfall is one of the best places for photography in Iceland. Also known as the ‘Lava Falls’, this magical location is only a short detour between the Snæfellsnes Peninsula and Golden Circle route. As such, it makes for easy photographic opportunities and is a much-loved site for both locals and visitors alike.
- Check out this 12 Days Yunnan Culture and Landscape Photography Tour
- Discover this Ultimate Guide to Landscape Photography
- Find The Best Waterfalls for Photography in Iceland
To make the most out of your trip to Hraunfossar, let’s take a look at the history behind the waterfall and the surrounding landscape, as well as our key tips for great landscape photography at this iconic location in Iceland.
History of Hraunfossar
The Hraunfossar waterfall spans across 900 metres in length, yet drops from a height of only 12 metres tall. What makes it so unique is that there is no river above it – rather, the waterfall is comprised of hundreds of rivulets of water that emerge from the porous, moss-covered volcanic rocks of the Hallmundarhraun lava field.
The lava field itself formed about a thousand years ago in the wake of a volcanic eruption beneath the Langjökull glacier, the second largest ice-cap in Iceland. As such, the area remains quite young and continues to change over time as the water falls through the cracks, reshaping the rocks before it flows into the turquoise blue Hvítá glacial river below.
Fed by Hraunfossar, the Hvítá river is home to another more famous waterfall called ‘Gullfoss’, which is situated on the Golden Circle. Although both waterfalls are beautiful in their own right, there is something truly fascinating about the way that Hraunfossar is formed which makes it such an exciting drawcard for landscape photographers on a trip around Iceland.
 Gullfoss is the more famous waterfall located on the Hvítá river. Photo by: 'Iurie Belegurschi'.
Access to Hraunfossar Waterfall
Hraunfossar is easily accessible, with a trail that runs along the waterfall for several hundred metres. There is also a wooden boardwalk at the beginning and terraced lookouts providing spectacular views of the rivulets tumbling down towards the river from the opposite side of the bank.
The path splits at a small man-made bridge that crosses the river, where you’ll have Hraunfossar to your left and another beautiful waterfall – Barnafoss – on your right. Translated to mean ‘Children’s Waterfall’, Barnafoss takes its name from local folklore about two children who drowned whilst playing nearby.
While the story behind Barnafoss may be dark, it aptly describes the power that emanates from this waterfall. In contrast to the delicate rivulets of Hraunfossar, the water at Barnafoss churns and pushes through a narrow gorge, feeding the glacial river below. It can be torrential when it is at full flow during the peak of glacial melt in the summer and offers a rare glimpse into the dynamism of the nature that surrounds this spectacular area.
Equipment You’ll Need to Photograph Hraunfossar
-
A reliable camera
-
Mid-range zoom lens or telephoto lens
-
Tripod
-
Graduated neutral density filters
-
Neutral density filters to create the dreamy, silky effect in the water
-
Memory card
While filters are not a necessity for shooting at Hraunfossar, they can come in handy in certain conditions. For example, graduated neutral density filters can help you to balance the exposure in the foreground and the sky, particularly if there are clouds and the top section of your photo is prone to being overexposed. Given that Hraunfossar sits between two small cliffs, the only thing above it is sky and if it’s cloudy, then a graduated neutral density filter will do wonders to allow you to get a properly exposed shot.
Neutral density filters can also help to create a dreamy, silky effect in the many rivulets of water that flow from this waterfall by allowing you to slow down your shutter speed, even when it is very bright outside. A 3-stop or a 6-stop neutral density filter will be useful at Hraunfossar, as there is not very much power within the rivulets to create a very interesting flow effect. On the other hand, shooting at Barnafoss is a different story – a 3-stop, 6-stop or even a 10-stop neutral density filter can make for some very interesting long exposure effects.
Keep in mind that if you’ll be using filters, then it’s best to have your gear mounted to a tripod to reduce the risk of camera shake. A tripod is also worthwhile at Hraunfossar to help balance heavier, longer lenses during an exposure.
Best Camera Settings for Photography at Hraunfossar
To minimise noise, it is best to set your ISO to its base or native setting of 100. Due to the relative flatness of the falls (they are more 2D than 3D), an aperture between f/8 to f/11 will allow you to get everything in the frame to be sharp and in focus.
As mentioned before, Hraunfossar waterfall does not flow very quickly and there is not enough power behind the water for freeze-framing droplets. It is best to shoot this waterfall with a longer exposure, as a faster exposure doesn’t create enough contrast between the water and the environment surrounding it. Try a shutter speed of between 5-10 seconds for a silky effect in the water.
How to Compose a Shot at Hraunfossar
While Hraunfossar may be very easy to navigate due to the well-defined path that runs along it, trying to compose and frame a landscape photo there can be quite tricky. Overgrown vegetation at the vantage points can obscure your view of the waterfalls, particularly if you or your tripod are not very tall. Although it may seem very difficult at first to get a clear shot, try using the branches of the surrounding bushes to frame the waterfall instead.
Another problem with shooting along the wooden boardwalk at the beginning of the trail is that it can be very shaky due to the foot traffic of other visitors to the waterfall. As such, you may have to wait for the perfect moment to release your camera’s shutter, at a time when there is little to no movement vibrating through the boardwalk beneath you.
Hraunfossar spans almost a kilometre in length, so it is near impossible to get the entire waterfall into one shot. Rather than aiming for a super wide angle frame, try using lenses with different focal lengths for more interesting compositions. A mid-range zoom lens is good for concentrating on smaller sections of the waterfall, where two or three rivulets branch off into the river below. You can even use a telephoto lens for an even tighter frame. By zooming in on the details, you’ll be creating a sense of mystery that entices the interest of your viewer to see the rest of the waterfall.
Best Seasons for Photography at Hraunfossar
Due to the location of Hraunfossar, it either receives light straight onto its face or not much at all. There are not very many sections of the waterfall that will have lines of shadow to ruin your shots. As such, you can photograph it at any time of the day, though the best times for photography at Hraunfossar are no doubt on overcast days, during golden hour and twilight. These are the times when the colours of the surrounding foliage are enhanced, perfectly complementing the gorgeous blue glacial water below.
 It can be difficult to compose a shot at Hraunfossar. Photo by: 'Iurie Belegurschi'.
Hraunfossar in Autumn
The foliage surrounding Hraunfossar is at its best during the peak of autumn, between late September and October. This is when the moss is at its most beautiful, turning a deep hue of burnt orange. Meanwhile, the bushes take on fiery shades of red and yellow. The result is a vibrant, heady mixture of tones that complements the bright blue glacial water perfectly.
Hraunfossar in Summer
While autumn is perhaps the best season for photography at Hraunfossar, summer also has its virtues. During the months of May to August, the moss around the waterfall is lush and green, contrasting perfectly with the black lava rock and the gushing white water that flows through the cracks.
Summer is a great time for photography in Iceland, particularly when the Midnight Sun takes hold in the late hours of the night. The warm glow can light up Hraunfossar in glorious shades of gold. Plus, there will be fewer visitors than during the day.
- See also: Summer Photo Workshops in Iceland
Winter at Hraunfossar
There are not many photos drifting around the Internet of Hraunfossar in winter, though that’s not to say that it isn’t just as spectacular when it’s cold.
During winter, parts of the waterfall may freeze, making for truly bewitching shots. Meanwhile, the surrounding moss may be covered in layers of snow, swathing the waterfall in a pristine and icy coat. The contrast between the glimmering white snow and the blue glacial water below is absolutely stunning, while the short daylight hours and ethereal winter light only add to the enchantment.
Be careful when visiting Hraunfossar in winter though, as the path around it can get very icy and slippery. For your own safety, wear crampons and do not stray off the trail.
Northern Lights at Hraunfossar
Although the idea of photographing the Northern Lights over Hraunfossar may be very exciting, the truth is that it’s just not a great location for it. The shape of the waterfall and the fact that it is made up of hundreds of rivulets makes it unsuitable as a foreground for the Aurora. The result may be that your viewer loses interest very quickly in the shot, with nothing to lead their eyes in or to keep their attention focused.
How to Make the Most of a Photo Shoot at Hraunfossar
Landscape photography at Hraunfossar can be difficult even at the best of times. Due to its location between the Snæfellsnes Peninsula and the Golden Circle, it tends to attract quite a few tour buses on their way between the two destinations. While not everyone there will be concentrating on photography, you can bet that most of them will be trying to take selfies or happy snaps all along the path.
Keep in mind that the path around Hraunfossar is quite narrow, so to keep yourself and your camera gear safe, be sure to stand in such a way that your tripod is protected from people tripping over the legs. The best way to do this is to make sure that you have two tripod legs out in front of you, forming a horizontal line, while the third and remaining leg is situated between your own two feet. This reduces the risk of your tripod being knocked over. You’ll also want to stabilise your tripod as much as you possibly can, particularly when shooting with a longer lens, as it may be difficult to get sharp photos with so much foot traffic vibrating through the boardwalk.
One trick to ensuring that you’ll end up with sharp images at Hraunfossar is to place your camera onto continuous mood and to shoot at high burst. Another is to turn on the image stabiliser option even while you’re using a tripod, as it can help to reduce camera shake coming through the tripod itself.
To get the most out of your shoot at Hraunfossar, make sure to allow yourself at least an hour or two to explore all the compositions, including Barnafoss as well.
How to Get to Hraunfossar
Now that you’ve got the lowdown on shooting at Hraunfossar, you’re probably wondering just how to get there. Luckily, it’s not too far from town – just a short 1.5 hour drive from Reykjavík. It’s situated between Reykholt and Husafell on Road Number 518. While there are no signposts along the way, there will be one just as you arrive.
It is free to park at Hraunfossar and the parking lot has ample space for cars and buses. There is also a small cafe onsite with toilets that you can use for a cost of 200 ISK. Although the parking lot has been notorious in the past for investors charging a parking fee, the collection of parking fees at Hraunfossar is not legal and cannot be imposed.
About the author: Serena Dzenis is a landscape photographer based in Iceland. You can find more of her work on her website or by following her on Facebook and Instagram.
Are you ready to chase waterfalls in Iceland? Check out our 5 Day Winter Photo Workshop of the South Coast, Glacier Lagoons and Waterfalls.


Other interesting articles

10 Essential Tips for Landscape Photography in Iceland
Photography has long been a form of creative outlet; with the dawn of digital technology it has made this art form accessible to all, thus the emergence of so many photography enthusiasts in the wor...Read more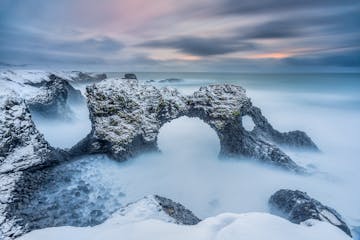
10 Simple Tips for Seascape Photography in Iceland
Even if almost 10 years have now passed, I remember my first trip to Iceland as if it were yesterday. I remember the emotion that I felt even before landing, when I looked out of the window and all...Read moreUltimate Guide to Photographing the Moon
I love photographing the moon. There’s something really exciting about just looking at it in the sky and imagining that you’re somewhere else. Although you might think it always looks the same, the...Read more