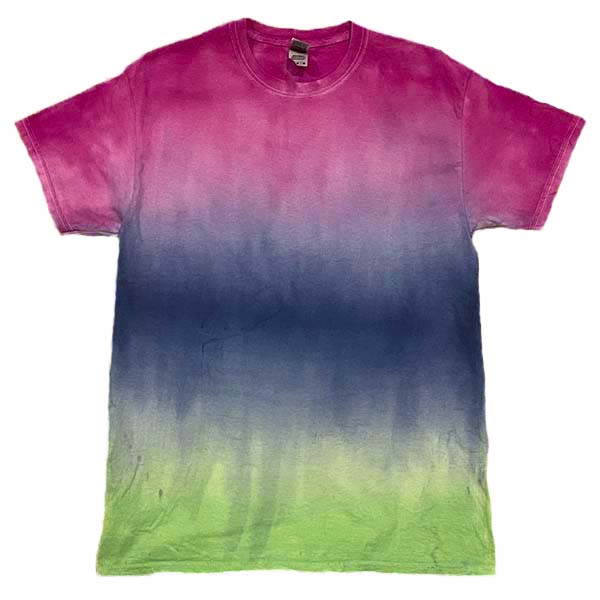
How To Rainbow Tie Dye

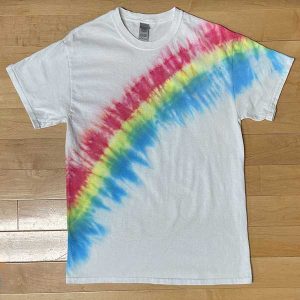
There are many versions of the rainbow tie dye pattern. I am a fan of this particular one because its a bit more subtle than typical tie dye where the shirt is covered in color. The design sure stands out though, against the white background which is really cool.
For this design I used only the 3 primary colors, but you could more to complete the rainbow (like this 7 color example: Tie Dye Sweatshirt: How To Create 2 Easy, Colorful Designs). I am also using an Adult Medium 100% cotton t-shirt, but any size shirt will work. The dye kit I use is Tulip’s one step dye which I love for its ease of use and bright colors.
Looking for a cheery rainbow? Let’s make one together!
FOR MORE TIE DYE 101 BASICS: HOW TO TIE DYE: THE ULTIMATE GUIDE
TO SEE MORE THINGS YOU CAN TIE DYE: 30 THINGS TO TIE DYE
RAINBOW TIE DYE
What you’ll need:
- White Shirt
- Rubber Bands
- Dye Kit (Which Includes Rubber Bands, Gloves, And A Plastic Sheet)
- Washable Marker (I like to use my kids’ Crayola Washable Markers)
- Plastic Wrap
- Plastic/Rubber Gloves
- Plastic Covering For Work Surface
- Painter’s Tape (optional)
- Baking Tray With Rack (optional)
- Paper Towels/Rags
- Gallon Plastic Bag or Plastic Wrap
Creating The Pattern
Usually we start with a damp shirt, but for this design you’ll want to start with a dry shirt.
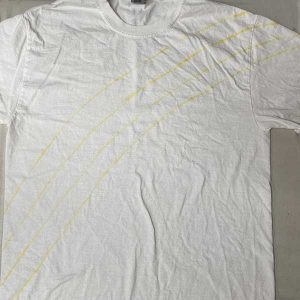
1. Lay the shirt flat on your work surface. Using the washable marker, create the rainbow arch lines on the shirt. For this one, I want to use 3 colors (red, yellow, and blue), so I need 4 lines to show where each color should go. NOTE: You can use more colors. Just mark the number of lines accordingly.
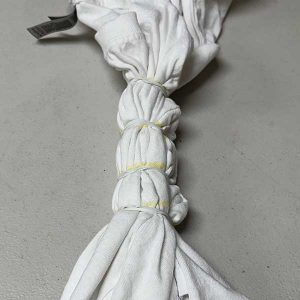
2. Once you have all of the lines marked, gather the shirt along the top line of the rainbow. When it is completely gathered up I like to make the starting and ending points of the line touch. That way it will be easier to wrap the rubber band around the marker line.

3. Take your first rubber band and wrap it around the marker line several times (so its tight). After the rubber band is on, you can adjust the marker line, if needed, in case it moved.
4. Gather the second line from the top of the rainbow and secure it with a rubber band. Adjust the line, again, where needed if it moved.

5. Continue gathering each additional line and securing with rubber bands until all lines have been wrapped with rubber bands.
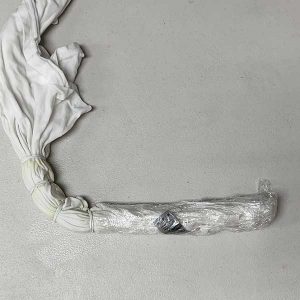
6. Now is the time to make the shirt damp. Since the rubber bands are already in place, if the marker starts to wash off it will be fine. Dunk the shirt in a bucket of water or sink and wring it out before starting to dye.
7. Because we are leaving the rest of the shirt white (aside from the rainbow), we will want to protect those white areas. Wrap both ends of the shirt, outside of the rubber bands with plastic wrap. Be sure to get it around a few times, so it doesn’t fall off and make sure the very end is closed, so dye cannot get in.
How To Tie Dye Rainbow Stripes?
In this example we are creating an arched rainbow, however, you can also make the lines straight in any angle on the shirt. As long they are even spaced out, the rainbow pattern will come through well.
Dyeing The Shirt
Baking sheet/rack versus just a workspace covered in plastic: I have dyed MANY shirts on just a covered workspace. As long as you have a ton of paper towels and are careful, you will be fine. It is, however, MUCH easier and more environmentally friendly (i.e. paper towel usage) if you use a baking sheet and rack because any excess dye goes directly onto the pan, away from your shirt, and you barely need to use any paper towels. If you plan on tie dyeing a number of items now or in the future I strongly suggest the investment (and the ones I purchased are not expensive).
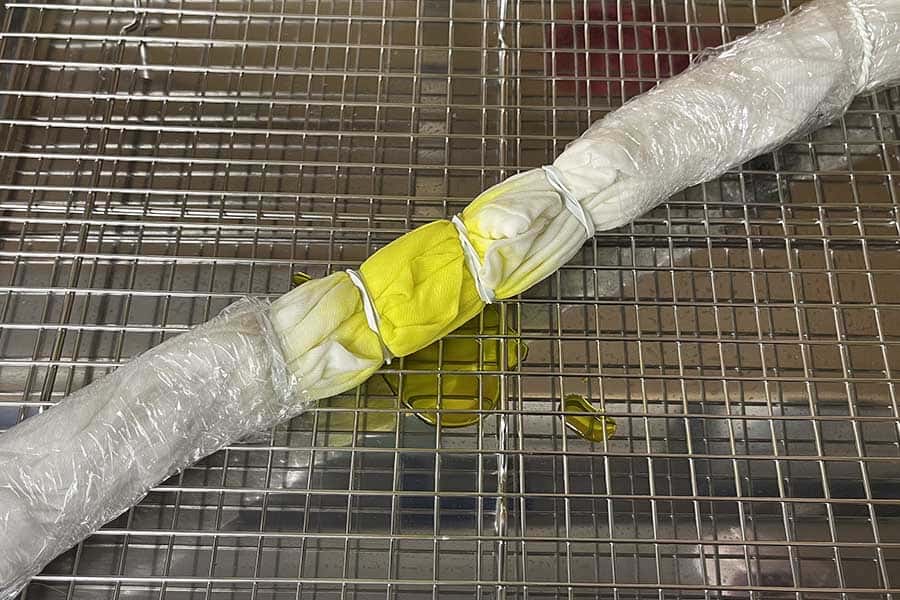
8. Set your shirt on the baking sheet/cooling rack or covered workspace and put on your gloves. Start with the weakest color, which in this case is yellow, and add the dye to the middle ring of the rainbow. Make sure to add extra dye and let it soak in, so it can get to the center of the shirt. Turn the shirt when needed to cover the entire ring.
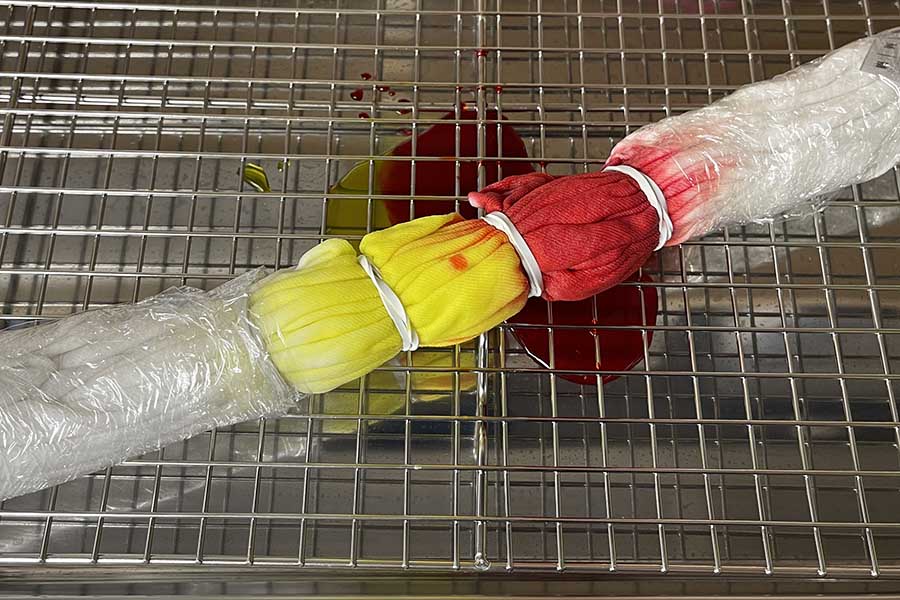
9. Add the red dye to the top ring just like you did with the yellow.
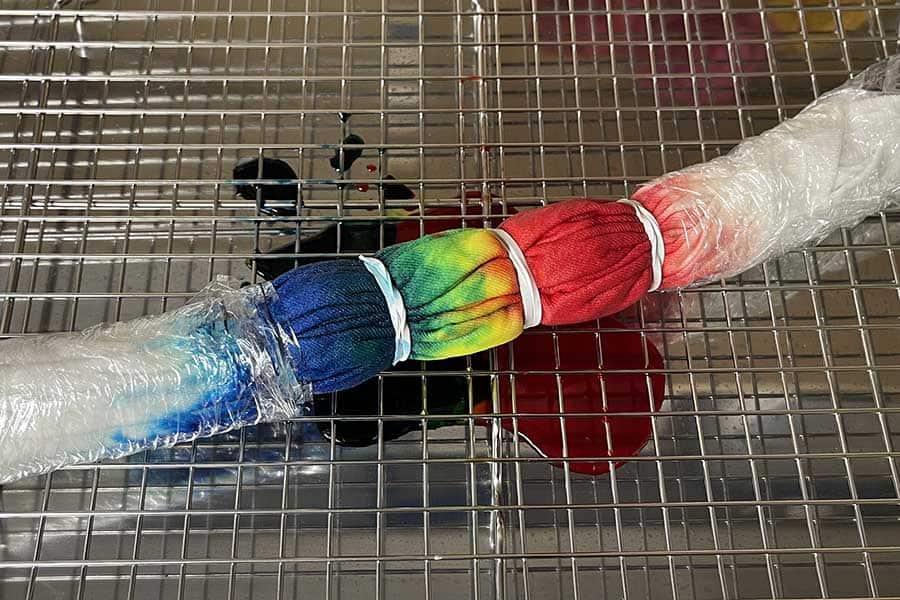
10. Add your last color, the blue, to the bottom ring.
11. Once the rainbow has been dyed, carefully place it in the gallon plastic bag or wrap the rest of the shirt in plastic wrap. Personally I prefer the plastic bag as you can easily seal it, label it (if you are dyeing more than one item) and move it if needed without worrying about dye leaking out.
12. Let the shirt sit for minimally 6-8 hours and up to 24 hours max, so the dye can cure. This will help produce the brightest colors.
Rinsing And Washing
Once the dye has cured, it’s time to rinse and wash the shirt. This is an important step as, if done in the wrong order or rushed, it can muddy up the nice colors and pattern you created.
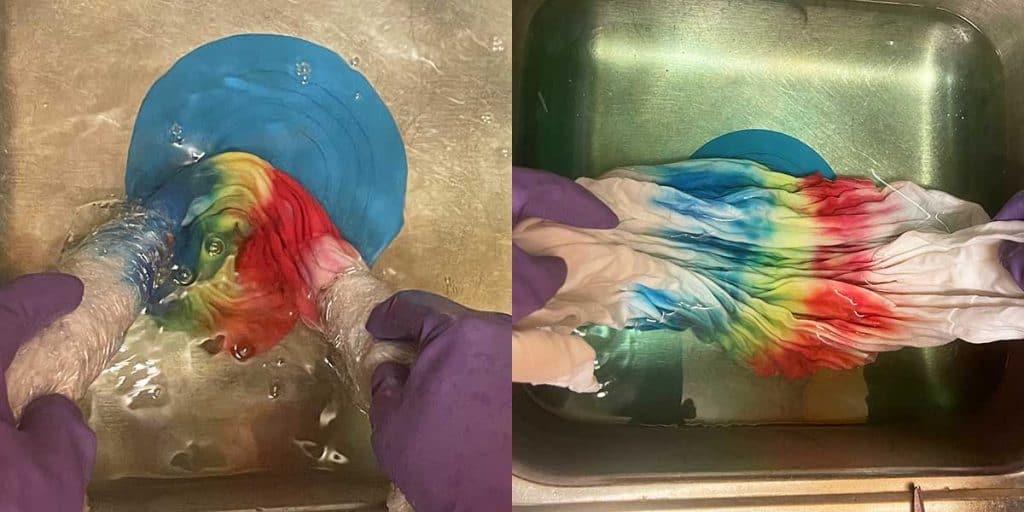
13. Fill part of a sink or bucket (something that can get dirty and won’t stain) with COLD water. (NOTE: We have a stainless steel kitchen sink, so I use that) The cold part is critical because it allows excess dye to wash out slowly while not dyeing the remaining white parts of the shirt.
14. Take the shirt out of the plastic bag. Holding the plastic wrapped ends of the shirt, dip the dyed rings in the water, swishing them back and forth a bit. After a few rounds of rinsing and the water being pretty clear, cut the rubber bands, remove the plastic wrap and continue to rinse just the rings.
15. Once the water is fairly clear, repeat the rinse process once more, but with luke warm water (not HOT). This should get the last bit of excess dye out before putting it in a washing machine.
16. Once the shirt is thoroughly rinsed, you can wash it in the washing machine. For this particular pattern I wash it by itself with a bit of detergent on warm (not hot) or cold.
17. Dry the shirt(s) in dryer or let air dry. Personally I prefer air drying as it extends the life of the dye color (as they will eventually fade a bit with washing).
NOTE: Wash the shirt by itself or with other tie dye items for the next few washings before adding it in with your other clothes.
And there you have it! A bright and happy rainbow tie dye shirt that is one of a kind and made by you! Awesome job!!