Tessellation Mania Art Lesson for Kids

Whether it’s a crossword, jigsaw, or Sudoku, puzzles engage our brain in more ways than one. Scientists have discovered that when we work on a jigsaw puzzle, we utilize both sides of the brain, improving memory, cognitive function and problem-solving skills in the process. By utilizing puzzles, people can stimulate the brain and improve several skills.
Students will discover the art of creating a tessellation and discover the idea of having the image repeat itself to create a pattern. We will observe and study the work of Escher and his optical image masterpieces. We will use watercolor pencils in order to depict patterns, and focus on blending techniques as well as study the art of repetition in a work of art.
Today we will look at the art of M.C Escher and his puzzle-like works of art!
Maurits Cornelis Escher (1898–1972) was a Dutch graphic artist who made mathematically inspired woodcuts, lithographs, and mezzotints. Despite wide popular interest, Escher was for most of his life neglected in the art world, even in his native Netherlands. He was 70 before a retrospective exhibition was held. In the late twentieth century, he became more widely appreciated.
Recommended Art Materials:
Faber Castell black Pitt Artist Pen
Eraser
Faber Castell Grip Watercolor EcoPencils
Paper Towel
White 9x12 construction Paper
3x3 cardstock piece for stencil
Scissors
Enjoy creating a repetitive design that works like puzzle pieces. This lesson can be challenging but is appropriate for students ages 6 and up. You can keep it simple or get more intricate with your repeated design creation. Most importantly, have fun and keep creating!
Instructions:

Step 1: Label the four corners of your cardstock with a letter and mark the middle of each side of the square

Step 2: On the top right corner, draw and cut out a curve, leaving a little flat space that I call the “nose”.

Step 3: The top curve piece is flopped and traced to make a symmetrical version. Cut out the shape.

Step 4: Both curved shapes are aligned and slide to the back of the square as shown. Tape in place. It is VERY important that the numbers read as shown as flopped and rotated shapes will not fit together when complete.

Step 5: Cut one equilateral triangle from the bottom of the shape. It is slid to the top, aligned with the front of the fish and taped in place.

Step 6: Place your fish template on a 9” x 12” drawing paper, and trace with pencil. It’s best to make one row going across the paper first, and then add rows on top, always interlocking the shapes when tracing.

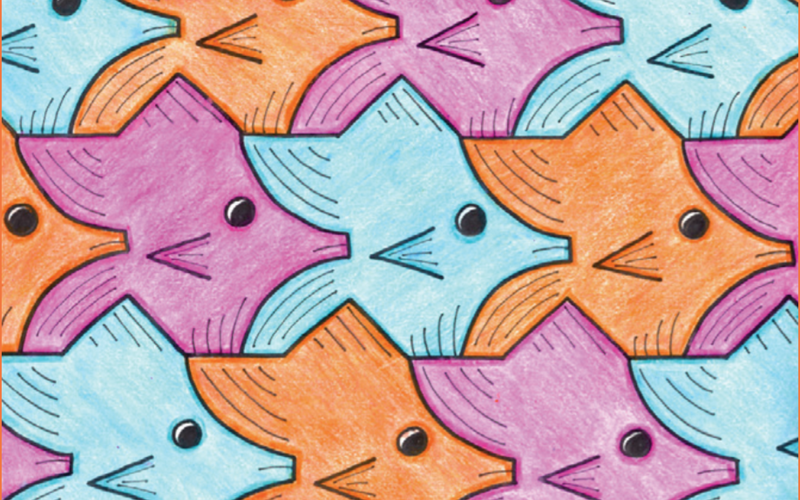
Step 7: Finish tracing all the paper and add detail to your fish like eyes, scales, and or any design desired.

Step 8: Trace the lines and fish details with black sharpie.

Step 9: Select 3 different watercolor pencils and fully color your fish in a color pattern design.

Step 10: Lastly, once you have finished coloring with the watercolor pencils using a wet brush paint over them to blend the colors. It is time to frame your masterpiece!
Art lesson by: Amy Friedman